Streamline Your Kubernetes Deployments with Argo CD: A Step-by-Step Guide

In this blog post, we will explore how Argo CD, a popular GitOps tool for #Kubernetes, can simplify and automate the deployment process of applications in #Kubernetes clusters. We will walk through the steps to deploy a test application using Argo CD, from setting up the application manifest to verifying the deployment. With Argo CD’s user-friendly UI and powerful CLI, you can enhance your DevOps practices and ensure smooth and reliable deployments in your #Kubernetes environment. Join us on this journey to streamline your #Kubernetes deployments with Argo CD!
Prerequisites:
A #Kubernetes cluster with Argo CD installed.
Argo CD CLI (argocd) installed locally.
Step 1: Create a Test Application
- Create a new directory on your local machine for your test application files. For example:
mkdir test-app
cd test-app
2. Inside the test-app directory, create a #Kubernetes manifest file for your test application. For example, you can create a deployment.yaml file with the following contents:
apiVersion: apps/v1
kind: Deployment
metadata:
  name: test-app
spec:
  replicas: 1
  selector:
    matchLabels:
      app: test-app
  template:
    metadata:
      labels:
        app: test-app
    spec:
      containers:
        - name: test-app
          image: your-container-image:tag
          ports:
            - containerPort: 80
This example creates a simple Deployment with one replica running a container with a specified image.
Step 3: Deploy Your Test Application Using Argo CD
Open the Argo CD UI by navigating to the Argo CD URL in your web browser.
Click on “New App” in the top right corner to create a new Argo CD application.
Fill in the required fields in the “New Application” form:
Application Name: Enter a unique name for your test application.
Project: Choose the project where you want to deploy your application.
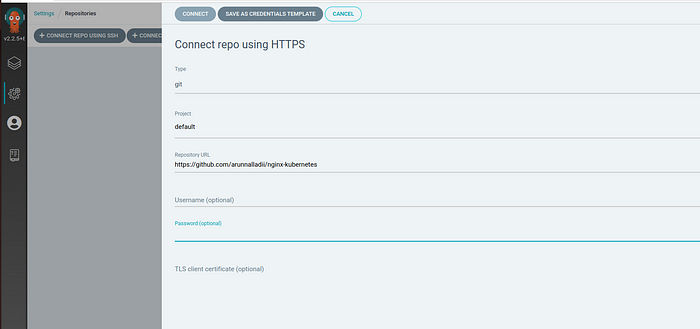
Repository URL: Enter the path to the Git repository where your test application manifest file is stored. For example, you can use a local file path like
/path/to/test-app, or a remote Git repository URL.

Path: Enter the path to the directory where your test application manifest file is stored. For example, if your manifest file is in the root directory of the repository, you can enter
/.Cluster: Choose the cluster where you want to deploy your application.
Namespace: Choose the namespace in which you want to deploy your application.
- Click on “Create” to create the Argo CD application and trigger the deployment of your test application.

Step 4: Verify Your Test Application Deployment
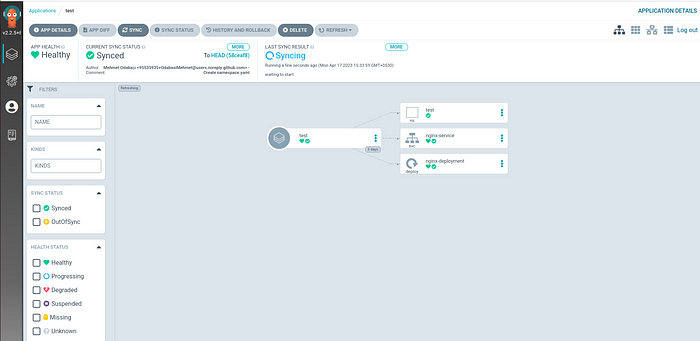
Monitor the deployment status of your test application in the Argo CD UI. Once the deployment is successful, you should see a green checkmark next to your application name.
Use the Argo CD CLI (argocd) to verify the deployment status from the command line. For example:
argocd app get <your-application-name>

3. Verify that your test application is running correctly in your #Kubernetes cluster by checking the pods, services, and other resources associated with your application.
Conclusion:-
Deploying a test application using Argo CD is a powerful and efficient way to automate the deployment process in #Kubernetes clusters. With Argo CD’s intuitive UI and robust CLI, you can easily create, manage, and monitor your applications, ensuring smooth and reliable deployments. In this blog post, we walked through the steps to create a test application, connect Argo CD to your cluster, deploy the application using Argo CD, and verify the deployment. By following these steps, you can streamline your application deployment workflow and improve your DevOps practices. Give Argo CD a try and experience the benefits of automated application deployments in #Kubernetes!
