Optimizing AWS S3: A Comprehensive Guide to Creating S3 Lifecycle Rules

Introduction :-
Amazon #S3 is a highly scalable and reliable object storage service that allows businesses to store, retrieve, and manage their data efficiently. With #S3 lifecycle rules, you can automate the process of transitioning objects between different storage classes or deleting them when they are no longer needed. In this blog post, we will guide you through the process of creating an #S3 lifecycle rule in AWS.
- Step 1: Open the #S3 Management Console
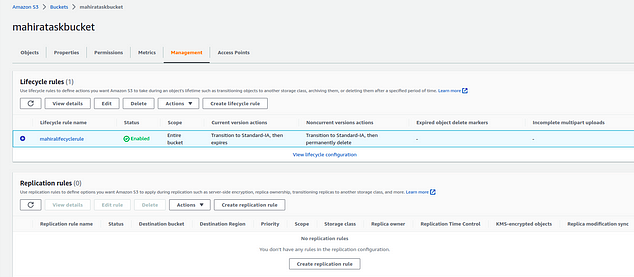
The first step is to log in to your #AWS account and open the #S3 management console. Once you’re logged in, select the bucket for which you want to create a lifecycle rule.
Step 2: Create a New Lifecycle Rule
Click on the “Management” tab and select “Lifecycle” from the dropdown menu. In the #S3 Lifecycle panel, click on “Create rule” to create a new lifecycle rule.

Step 3: Define the Rule
In the “Create Lifecycle Rule” dialog box, you can define the rule by specifying the following parameters:
a. Name: Give a descriptive name to the rule.
b. Filter: You can filter objects based on their prefix, tags, or other attributes.
c. Transitions: Specify when you want to transition objects to a different storage class. You can transition objects to the #Standard-Infrequent Access (SIA) or Glacier storage class after a specific number of days.
d. Expiration: Specify when you want to delete the objects. You can delete objects after a specific number of days or on a specific date.
Step 4: Review and Create the Rule
After defining the rule, review the parameters and click on the “Create Rule” button to create the rule.

Conclusion :-
#S3 lifecycle rules provide a #cost-effective way to manage your data by automating the process of transitioning objects between different storage classes or deleting them when they are no longer needed. By following the simple steps outlined above, you can create an #S3 lifecycle rule in #AWS and start managing your data efficiently.
