
Optimizing Cost Efficiency: A Guide to Setting Up Kubecost on Minikube


To install kubecost on ur minikube :-
First, start the Minikube using a driver to create a minikube cluster. I am using the docker driver to start the minikube.
In order to install Kubecost, you need the following prerequisites:
A Kubernetes cluster. You can use any cloud-based cluster like EKS or GKE, or you can use a local cluster with Minikube.
Kubectl installed and configured for your cluster.
Helm 3.0+ installed and configured.
First, Use the following command to create a
kubecostnamespace and install Prometheus, Grafana, and kube-state-metrics in the namespace. You can further customize the installation with additional configuration as described here.
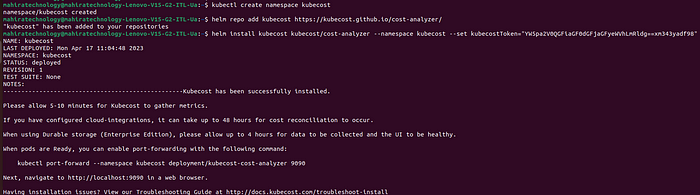
kubectl create namespace kubecost
helm repo add kubecost https://kubecost.github.io/cost-analyzer/
helm install kubecost kubecost/cost-analyzer --namespace kubecost --set kubecostToken="YW5pa2V0QGFiaGF0dGFjaGFyeWVhLmRldg==xm343yadf98"
- Next, check that all the pods are in the
Runningstate.
kubectl get pods -n kubecost

Once the pods are in running state, then change the server to localhost:9090
Run the below command to change the server to local host://9090
kubectl edit cm nginx-conf -n kubecost
- Search for kubecost-cost-analyzer.kubecost:9001 and kubecost-cost-analyzer.kubecost:9003 and change them to localhost:9001 and localhost:9003 respectively.As shown in the below figure.
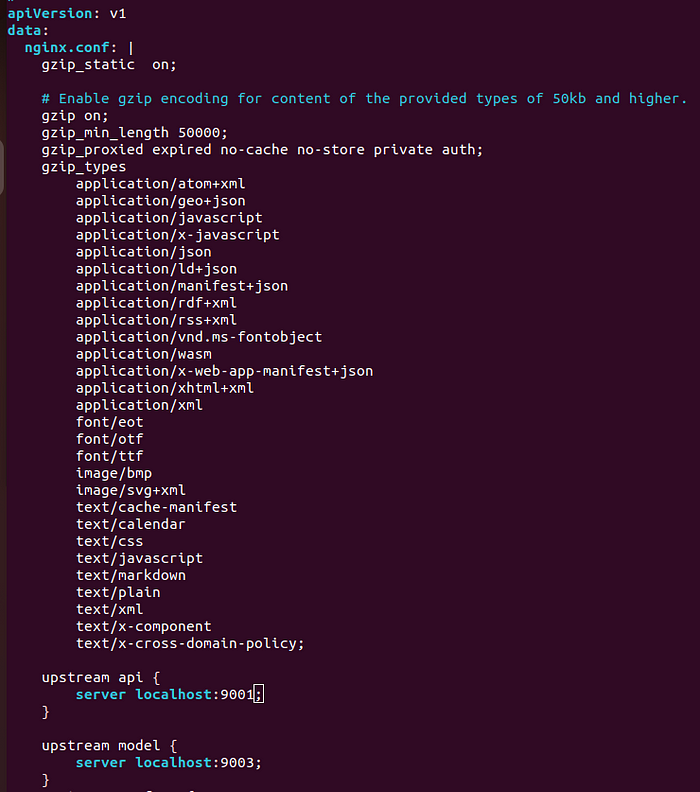
Save the file and close the editor.
Restart the
kubecost-cost-analyzerpod. There are many ways to do it, but the most straightforward is running the below command -
kubectl rollout restart deployment kubecost-cost-analyzer -n kubecost
Once the pod is restarted, run the following command to enable port-forwarding:
Run below command for port forwarding -
kubectl port-forward --namespace kubecost deployment/kubecost-cost-analyzer 9090

Now you can visit
localhost:9090in your browser. To see the kubecost dashboard.Once u visit the kubecost dashboard looks like this -
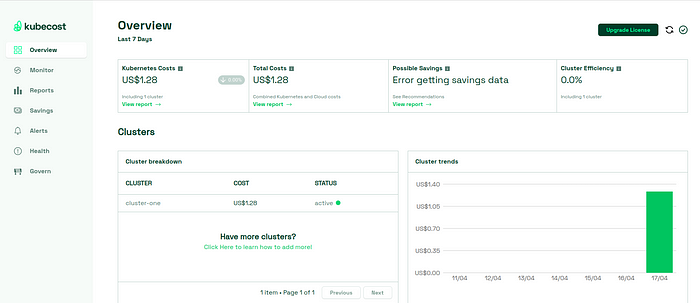
- You can click on the clusters, which should take you to the dashboard where you can see various information about your cluster at a glance. The details of the cluster will be displayed as shown below -
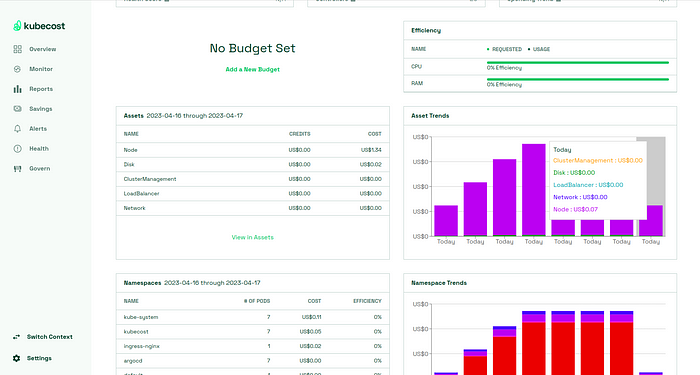
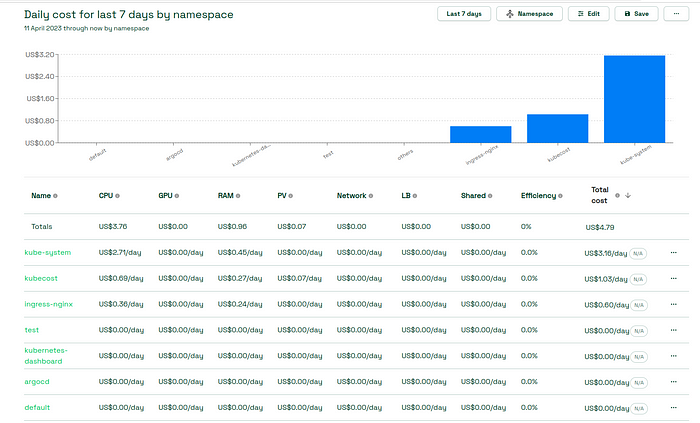
- Once Kubecost has been installed, you can start by looking at the cost allocations. The Cost Allocation page shows you a breakdown of your expenses. By default, the breakdown is grouped by namespaces as shown below -

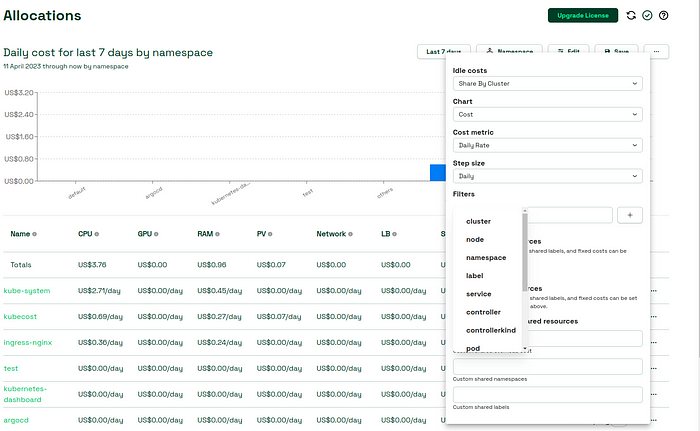
You can use the Aggregate By dropdown to see the breakdown by various Kubernetes concepts like clusters, containers, deployments,and pods.
These aggregations are based on Kubernetes labels referenced at the pod or namespace level as shown below -
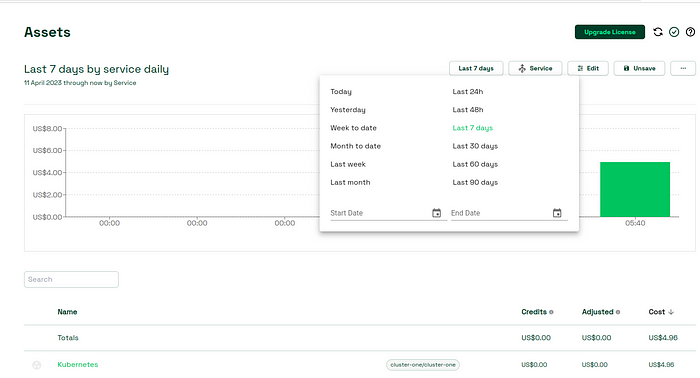
Click on the assets to check the Date Range dropdown, you can change the date range of the report. You can use some common ranges like Last 7 days, Today, Yesterday, and Last 30 days, or you can enter a custom start and end date.
Once the changes in made save and load the webpage to view the changes -
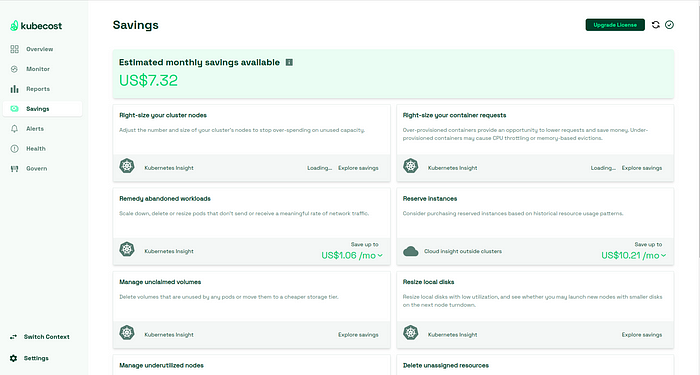
- The Savings page lists some recommended actions that can be taken to save some cost. These actions include Estimated Monthly savings available,Right-size your cluster node, Right-size your container requests, Remedy adandoned workloads etc,. . Click on each recommendation to learn more about them.
- On the Health page, you can see the health score of your cluster, which is an assessment of infrastructure reliability and performance. Kubecost performs a few health tests like monitoring for high CPU and memory utilization. checking for crash looping pods, looking for failing jobs, network issues, and CPU throttling. These health checks ensure your cluster is running smoothly.

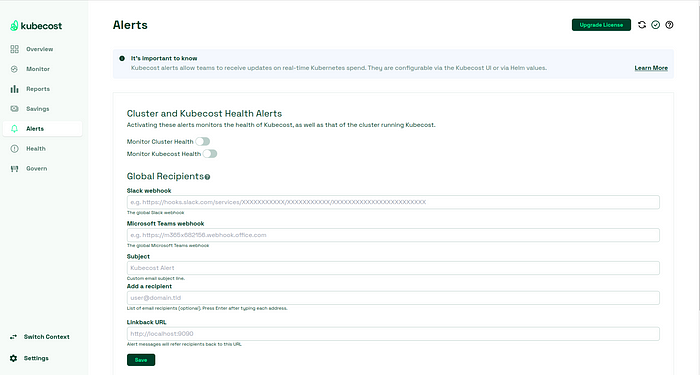
Set up Slack,Teams or email alerts by visiting the Alerts page.You can configure the alerts by adding a webhook url .
You can set a daily threshold at the cluster level or for individual namespaces and get alerts when the cost exceeds the threshold. Optionally, set it up to send you weekly updates and cluster health updates
Conclusion -
- Finally we have Setup the kubecost on minikube and observed the kubecost workflow in the above Documentation.
#CostEfficiency #Kubernetes #Minikube #CloudNative #DevOps #CostOptimization #TechTrends #LinkedIn #CloudComputing #Kubecost #CostManagement