Photo by Rubaitul Azad on Unsplash
The Ultimate Guide to Effortlessly Connecting Your JIRA Project with Your Slack to Create Issues

Introduction :-
Imagine a world where your project management tool and your team communication platform work together like peanut butter and jelly. That’s the dream, right? Well, good news: It’s entirely possible, and I’m here to show you how. By connecting JIRA with Slack, you’ll not only streamline project updates but also foster better team collaboration. Stick around, and I’ll walk you through every step of the way.
Pre-requisites :-
Before we dive into the deep end, let’s make sure you’ve got everything you need:
A JIRA account :- This one’s a given. You’ll need access to a JIRA project to connect it to Slack.
A Slack workspace :- This is where the magic happens. Make sure you have the necessary permissions to add integrations or apps.
Admin access :-You’ll need to be an admin or have similar permissions in both JIRA and Slack for this setup.
These are the keys to the kingdom. Once you have these ready, you’re all set to bridge the gap between JIRA and Slack.
Procedure :-
Let’s break down the steps to connect your JIRA project with Slack. Trust me, it’s easier than you think.
Step 1: Find the JIRA Cloud App in Slack
Start by searching for the JIRA Cloud app within Slack’s App Directory. It’s as straightforward as typing “JIRA” into the search bar. Once you find it, click the “Add” button.


Step 2: Linking Your Accounts
Next up, you’ll need to link your Slack workspace to your JIRA project. This usually involves signing in to your JIRA account and granting the necessary permissions. Go to your project settings and click on Apps. Now select Slack integration. Go a head and select the slack workspace in which you want to add to your jira project. Then select the Channel in which u will receive the task messages. Finallay Click on connect project.


Step 3: Creating Issues from Slack
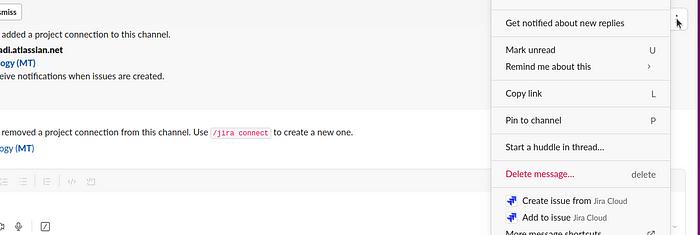
Did you know you can create JIRA issues directly from Slack? Yep, simply use the slash command (e.g., /jira create) followed by your issue details, and watch as it magically appears in your JIRA project. This feature alone has been a game-changer for many teams.


Conclusion :-
There you have it — a simple, step-by-step guide to making your JIRA and Slack work in harmony. By setting up this connection, you’re not just integrating two platforms; you’re setting the stage for more efficient collaboration and communication within your team. So, go ahead, give it a try, and watch as your project management process gets a little bit easier.
